In my last article, I talked about why I use Asana for planning blog content. I thought it would be helpful to show you how to use Asana for this purpose because I’m pretty sure if you look at Asana’s website you will think the tool doesn’t look at all like something that should be used for content planning.
But it is a great tool for planning blog content, even if you are just a one-person business, and it can grow as your business grows. Asana’s big picture purpose is to make working on projects in a team an awesome experience. So imagine if you become an awesome blogger or your business gets successful enough that you have a team. You’ll be able to take what you’re already doing in Asana and share it with your new team members as tasks get delegated and you’ll have a tool you are really familiar with to use to grow any aspect of your business.
Just a heads up before we get into using Asana: Asana has enormous capabilities. It is far, far, more robust than what I am about to show you. Asana really will grow with your business’ needs. This step-by-step guide is not designed to go deep. It’s very specific about one way to use Asana and I keep this super simple.
First, create an Asana account. It’s free and pretty quick to do. When I signed up, I treated by sign up as an organization rather than just personal. I don’t know what the sign-up process looks like today, but if they ask, I’d encourage you to do the same so it is easy to add team members from your business as your business grows and so you see a similar screen to what I am showing you.
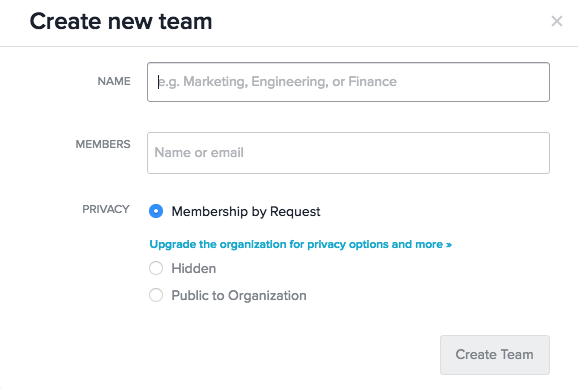
Next, you’ll want to start by creating a team. In Asana, everything starts with a team. It might just be a team of one to begin with (that’s you). If you have others you want to have access to the team, you’ll be able to put their email addresses in as you set up the team name.
In Asana, you can give your team name anything you want. I have a team that is just my stuff so that team is my name. Then I have a team for my client work, which has the name of my business. You can create as many teams as you want, but keep things as simple as possible by creating as few teams as possible. For now, just create the team that would hold projects related to your website or blog.

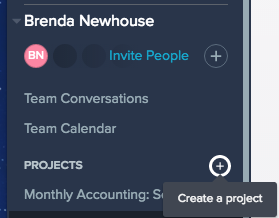
Next, within your team, you’ll create a project. Asana will allow you to have as many projects as you would like within a team. Just click the plus sign next to the “Projects.”
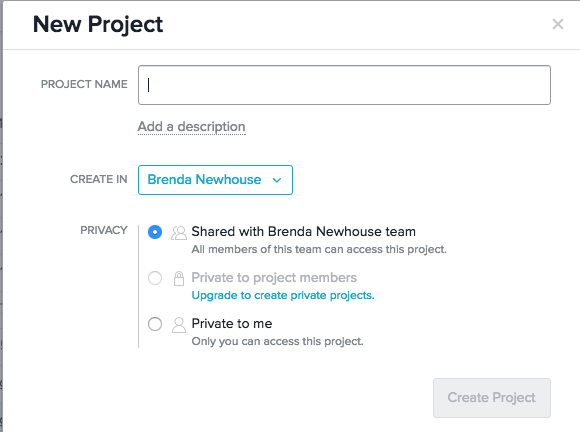
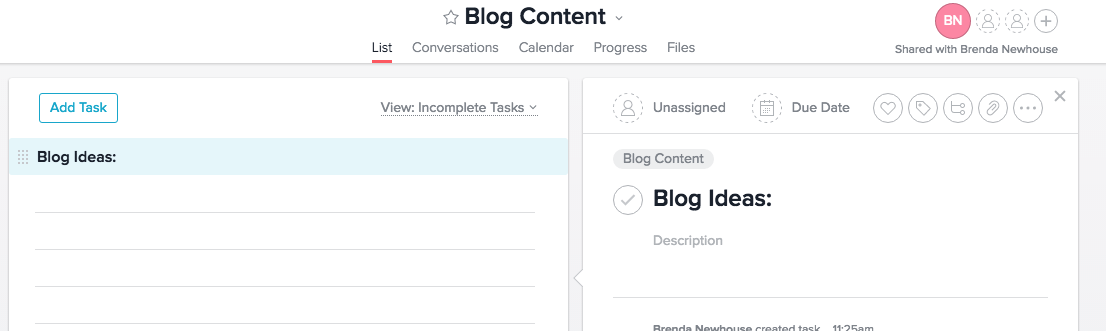
Next, Asana will ask you to name your project. It will also ask you if you would like to share it with anyone. In this case, I don’t need to add anyone to my sharing.
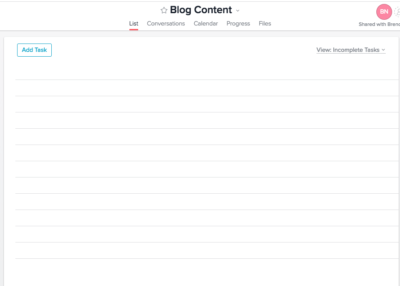
Once you have a new Asana project created, Asana will send you to a big, blank project area with nothing in it. This is where you can create tasks galore.
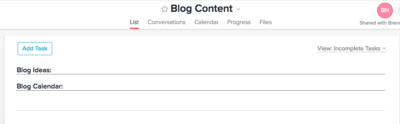
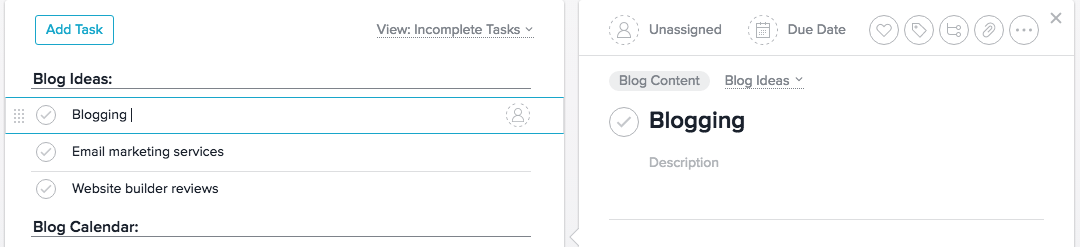
In the case of planning blog content, this is where you can break down blog content by ideas, by dates, or both. In this case, I’m going to start with ideas. I’ll give the phrase “blog ideas” a colon. When Asana sees a colon, it assumes you want a section header. So if I type “blog ideas:” and press my enter or return key, Asana will bold the phrase and turn it into a header.
I’m going to create another section for planning blog content. This will be “blog calendar:”
“Blog Ideas” will be just that, ideas. I’ll list main categories and then within each category I will get more specific about the blog ideas I plan to produce.
“Blog Calendar” will be broken down by cycle. Since I talk about a number of topics, I’d like to address some concepts within each topic area before completing a cycle. At the end of the cycle, I want to take an assessment of what has happened regarding my blog engagement, like reviewing Google Analytics for users and for search engine activity; I use this information to help me make decisions about where to take each topic for the next cycle.
Planning Blog Content ideas with Asana
Now that your framework for your project is set up, let’s start by entering ideas. In my case, I want to pay attention to how many big ideas I have on my site, so in the main project area, I’ll enter each big idea as its own task. To do this, I’ll begin by clicking once after the colon that follows “blog ideas” and then I’ll press “enter” or “return” on my keyboard. You should end up with a new blank line in Asana.
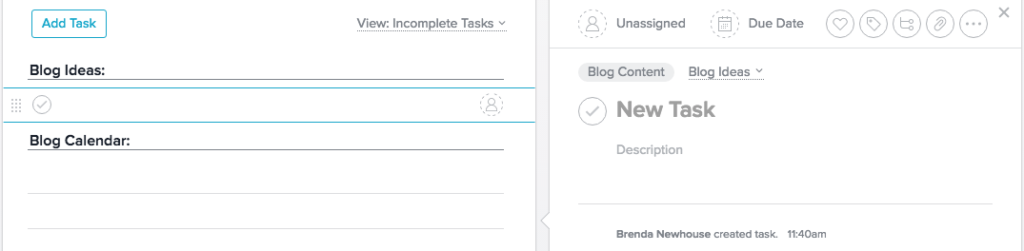
To create new blank tasks, you can simply press “enter” or “return” as many times as you want. Once you’ve listed some of your ideas, you might want to re-prioritize them. This is easy to do; you’ll just click and hold a task and then drag it to its new position.
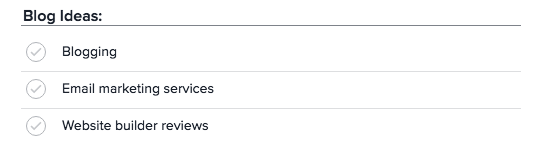
Below you’ll see some of the topics I want to cover:
Each blog topic is a “task” in Asana. If I click on a task, you’ll get a secondary screen that allows you to enter details.
Planning blog content details
To begin entering details into the secondary task screen, press your Tab + S. That’s your tab key plus your “s” key.
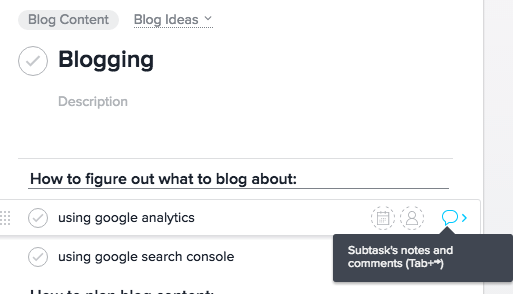
Again, I’ll enter headings. As I enter headings, I’ll enter details. Headings are created like before; just enter the heading name and press your : key. After I enter a heading, I’ll press my “enter” or “return” key and put in some details.

Within each blog detail, I can get further detailed. This is where I’ll break out all sorts of ideas and add resources, like links to articles and tutorials. I might also add PDFs and images. I do this so when I’m ready to write the article everything I need is all in one place.
How do you add details about each topic? You hold your mouse over a topic, wait for the blue comment bubble to appear, and then click the comment bubble.
Once you do this, you’ll be in a very familiar-looking screen. You’ll begin by pressing Tab + “S” again, that’s your Tab key plus your “s” key. From here, I’ll enter all my ideas. I might have headings with links. I might just put in articles. It all depends on what information I have so far for planning ideas related to that topic. Here are things you can do to collect your ideas:
- Copy a URL to an article and paste it in as a task.
- Drag PDFs into the area.
- Drag images into the area.
- You can add another layer of detail by putting your mouse on the subtask and clicking the blue comment bubble.
When you have finished with a subtask, you can just check that subtask off your list.
Planning blog content typically is a free-flowing creative process for me that used to leave me frustrated because I didn’t have a good way to keep all the pieces and parts of an idea in one memorable place; planning blog content with Asana has made doing this easy and intuitive. I can be as broad or specific as I want to be. I can drag items around to reorder them whenever I’d like. I can access the information from my phone or on any computer, allowing for spur-of-the-moment ideas to be recorded. I’m forever grateful for Asana. I can finally build ideas into articles in a simple, fluid process.