This is a series of free Jigsy tutorials. I’m going to walk through not only how to do the essentials to build your own website with the Jigsy website builder, but also in each tutorial I will offer advice along the way to help make your website be its strongest for promoting your business and make creating your Jigsy website as simple a process as possible. So let’s get started with today’s Jigsy Tutorial, Editing a Menu in Jigsy: Creating a Text-only Header.
This tutorial includes:
- How to plan your website’s menu around your marketing goals
- How to create a header for your drop-down menu
The next tutorials in this series will cover:
- How to change the order of your pages in your menu
- How to add pages to your Jigsy website menu
- How to create a drop-down menu
- How to link to other websites directly from your menu
Your Navigation Bar is Your Most Important Tool on Your Website for Growing Your Business
When I begin a website with a client, the first thing I ask is, “What are your business growth goals?” The next thing I ask is, “How do you think your website will help those goals?”
Once I have an idea of where my client wants to go with their business in the near future, we can begin to plan the website and it all starts with the navigation bar. The navigation bar should lead the website visitor to what you want them to do next with your business.
Do you want them to sign up for your email list?
Do you want them to clearly understand what you have for services and products?
Do you want them to see how your product or service can make their lives better?
Do you want them to trust you as an authority in your industry?
The answers to these questions direct what goes into your website’s navigation bar.
Think of the navigation bar as a table of contents to a book. Have you ever browsed books at a bookstore by reading the table of contents and then decided this is the book for you? (How to, self-help, diet, and philosophy books are all books I have vetted by looking at the table of contents.)
Or think of the navigation bar as your 30-second commercial. If a person scans your site by looking at your menu, will they be confused or excited? Will they know if they are in the right place?
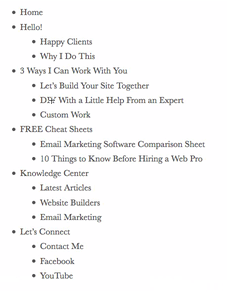
When planning a navigation bar, my clients and I usually create an outline to start. Maybe it is a bulleted list in Word or scratched out on a napkin. I like using Word or Asana because I can easily create an outline and I can make comments next to each item. Here’s what a portion of my site looked like when I mapped it out in Word:

Once you have your outline for your menu figured out, you are ready to begin creating your menu.
Editing a Menu in Jigsy
To begin editing a menu in your Jigsy website, begin by simply placing your mouse over the menu. An outline should appear.

Next, place your mouse over the gear that appears in the lower-right corner of the outline.
When you do, a pop-up menu should appear with two options: Edit and Animations. Choose Edit.

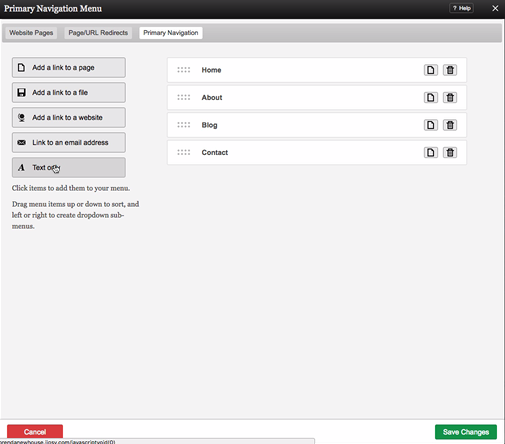
Once you click “edit,” a dialog box will appear that allows you to edit your menu.
How to Create a Text-Only Header for Your Drop-down Menu
Based on my outline for my website shown above, I can see that the second item I would like in my website is entitled, “Hello!” I know that all I want “Hello!” to do is to trigger a drop-down menu to appear. “Hello!” is not a page; it is a header. When editing a menu in Jigsy, you will use the “Text only” option to create a header in your menu. To start, just click “Text only.”

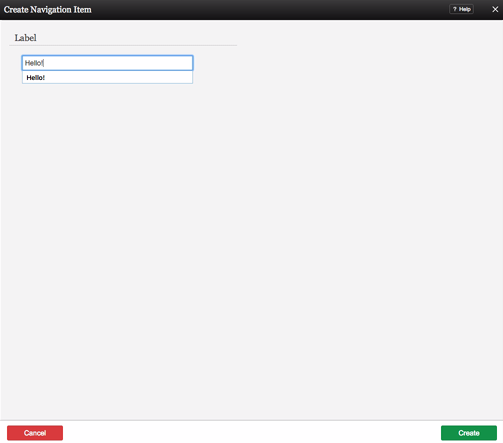
Once you click “Text Only,” you will be prompted to type the text you want people to see. Once you type the text, click the green “Create” button in the lower-right corner of the Text Only dialog box.

Now that you know how to create header items in your Jigsy menu, let’s move on to the next tutorial, which will cover:
- How to change the order of your pages in your menu