This is a series of Jigsy tutorials. I’m going to walk through not only how to do the essentials to build your own website with the Jigsy website builder, but I will also offer advice along the way to help make your website be its strongest to promote your business. This tutorial will show you how to create pages in Jigsy.
Please note, I am not in any way paid by Jigsy for these tutorials or anything I write about them.
So let’s get started with today’s Jigsy Tutorial: Creating Pages in Jigsy
What you’ll learn:
- How to create pages in Jigsy
- How to add pages to your Jigsy website menu
- How to change the order of your pages in your menu
Login to your Jigsy Website
When you first login to your Jigsy website, you will be directed to your Jigsy dashboard.
Within your dashboard, there is a section labeled “websites.” In the Website section, click Edit Site.
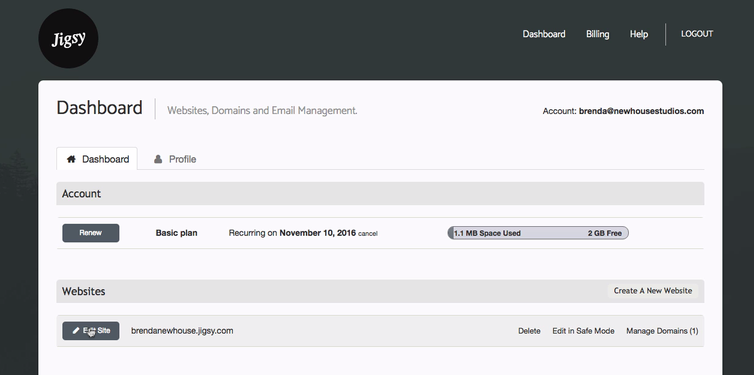
Next, you’ll see your website as it appears live on the web.
As a side note, I am doing my Jigsy work in a Google Chrome browser on a Mac computer. I tried working with the Jigsy website editor in Firefox and found I had problems; Chrome is behaving just fine.
Why You Want to Begin Your Website by Creating Pages
The reason I am starting with pages in this tutorial is because, it’s been my experience that when you are creating a website, it is best to begin with the content of your site. I think you should have your pages planned out and in place on your website before you worry about what theme you really want or what bells and whistles you would like for your website. Your content drives everything.
Jigsy Starter Pages
When you begin a website with Jigsy, you will find that Jigsy has already provided the following pages:
- Home
- About
- Blog
- Contact

Plan Your Website Pages Before You Create Them
Ideally, before you create pages in Jigsy for your website, you will map out a plan somewhere else about what you want. You could map out your plan
- On a piece of paper,
- In a Word document
- In a spreadsheet
- With post its
- On a dry erase board
For my most recent version of brendanewhouse.com, I mapped out an outline in Word, just using a bulleted list, like this:
- Home
- Hello!
- 3 Ways I Can Work With You
- FREE Cheat Sheets
- Knowledge Center
- Let’s Connect
Then, to plan my drop-down pages, I added to the bulleted list, like so:
- Home
- Hello!
- Happy Clients
- Why I Do This
- 3 Ways I Can Work With You
- Let’s Build Your Site Together
- DIY With a Little Help From an Expert
- Custom Work
- FREE Cheat Sheets
- Email Marketing Software Comparison Sheet
- 10 Things to Know Before Hiring a Web Pro
- Knowledge Center
- Latest Articles
- Website Builders
- Email Marketing
- Let’s Connect
- Contact Me
- YouTube
Create Pages in Jigsy
In this case, I’m going to use my site as an example for to show how to create pages in Jigsy. I’m going to add Hello.
In the top menu bar, you will see Pages. Home should be showing next to Pages. Place your mouse over Home and a drop-down menu should appear showing you all the pages on your website.

To create pages in Jigsy, just click the Add New Page button.
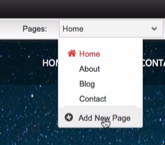
The Create a New Page Dialog box will open.
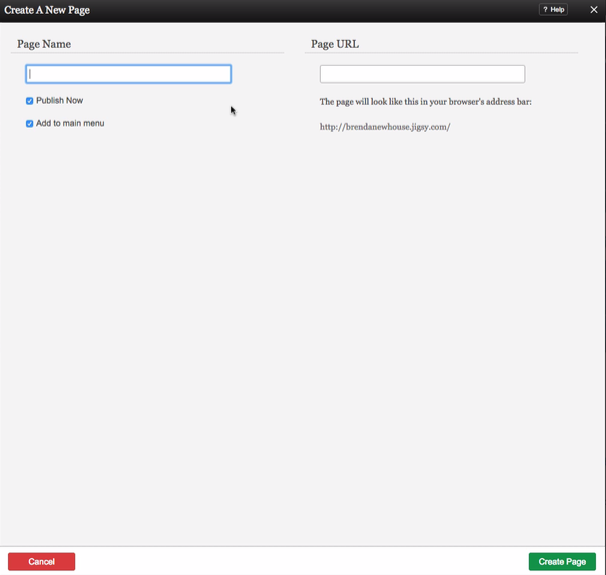
In the left-hand side of the dialog box under Page Name:
- Type the page name that you want people to see.
- Select Publish Now so it will be live online immediately.
- Select Add to main menu if you want the new page in your main menu.
In the right-hand side of the dialog box under Page URL:
- Type in what you’d like the URL to look like. Jigsy will fill this in for you based off of your page name, but you can change it.
- It is important that your page name have keywords in it related to the page to help search engines understand the main content in that page.
Lastly, in the lower-right portion of the dialog box, click the green Create Page button.
Changing the Order of Your Pages in Your Jigsy Main Menu
Place your mouse over your main menu. When you do, you should see a box appear that surrounds the menu.

In the bottom-right corner of the box, you should see a little gear icon. Place your mouse over that. When you do, a pop-up menu appears with the words Edit and Appearance in it. Click on Edit.

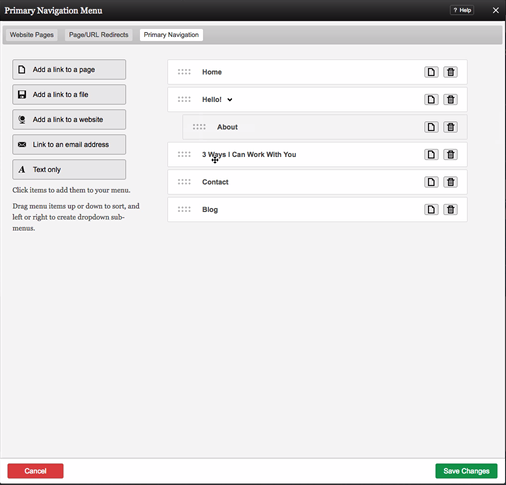
After clicking on Edit, the Primary Navigation Menu dialog box appears.
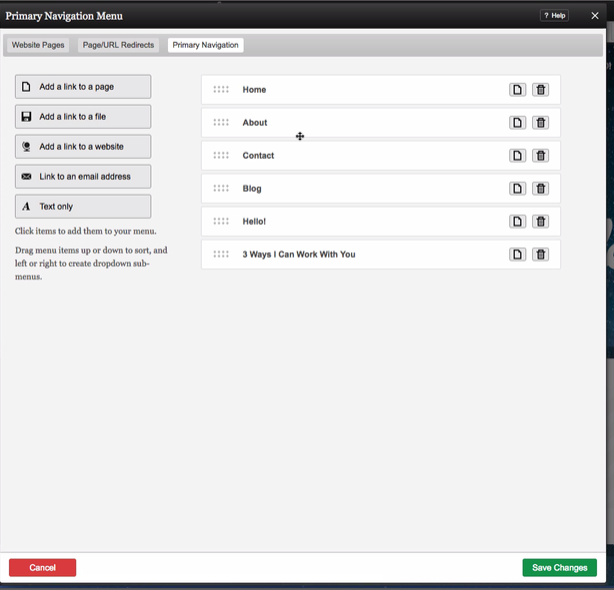
In this menu, simply click and hold the page you wish to move and then drag the page to where you’d like it positioned in the menu.
Creating a Drop-Down Menu in Jigsy
Within the Primary Navigation Menu dialog:
- Click and hold the page you would like to have as a drop-down item
- Drag it under its parent item
- Before letting go, slightly drag the item to the right, so it appears under your parent item and indented.
- Let go.
Your drop down item should look like my example below. If it does, you can click Save Changes, which is the green button in the lower-right corner of the Primary Navigation Menu dialog box.
In the next Jigsy website builder tutorial, I will cover more about editing the primary navigation menu..
I haven’t had a chance to check out jigsy. It appears quite user friendly. Does it have a lot of features for SEO?
Hi there, Susan!
The last time I looked into Jigsy, it didn’t have SEO features that were as good as Squarespace’s.
These days, I pretty much send people to Squarespace over all the other website builders.