This tutorial shows you how to create a Jigsy account for your website and this is the first in a series of Jigsy tutorials. I’m going to walk through not only how to do the essentials to build your own website with the Jigsy website builder, but I will also offer advice along the way to help make your website be its strongest to promote your business.
I did a Jigsy review recently. Read the review here.
Please note, I am not, in any way, paid by Jigsy to create these training videos.
So let’s get started with the first step in building a website with Jigsy: Creating an account.
What you’ll learn:
- How to create a Jigsy account
- Why you should have a paid account
- Which paid Jigsy account I think is best for getting started
Jigsy offers three paid account levels.
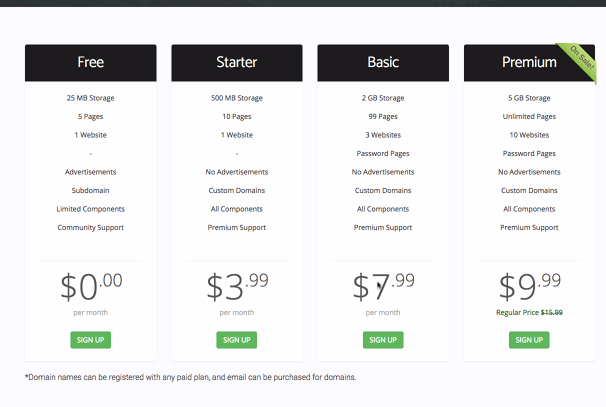
The one I’d recommend is the $7.99 a month version. If you’re going to use your website in hopes of being found by people who are doing searches online, meaning they don’t know your business’ name, you’re going to need to create a fair amount of content to get noticed by search engines. The $7.99 account gives you 99 pages to get started; the $3.99 account only gives you 10 pages. You’re going to need a lot more than 10 pages to get noticed by search engines, so the $7.99 account is the way to go.
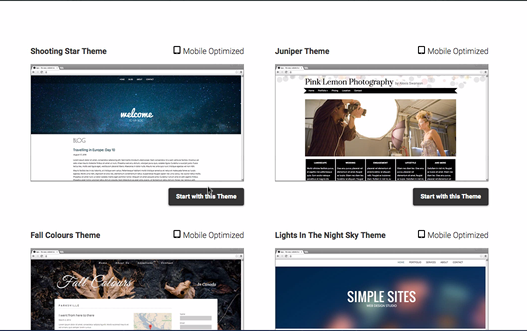
Once you click the “sign up” button, you are asked to choose a theme. If you’re following along with me, you’ll want to choose the Shooting Star Theme. I chose this theme because it is super simple, and for now, as we get to know Jigsy, I’d like things to be as easy as possibly. We can always change our theme later.
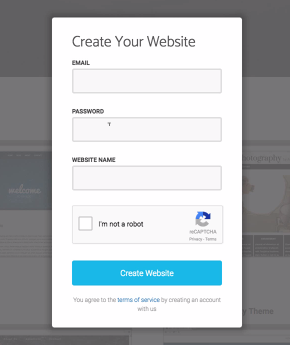
Next, you’ll be asked by Jigsy to enter your email address, a password, and a domain name. Don’t stress about the domain name for now because you’ll be assigning your actual domain to the website later. Normally, I choose a domain name that is either the same as the one I hope to purchase.
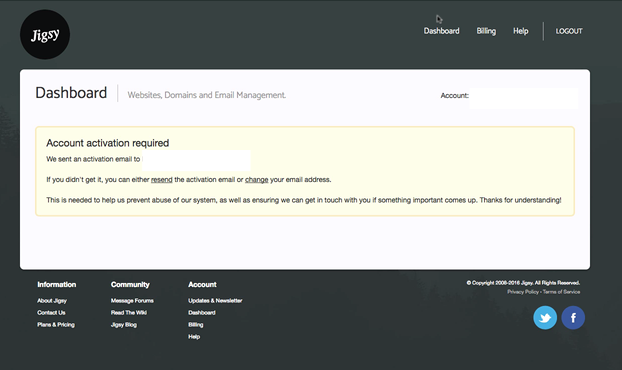
Once you click Create Website, you’ll be in the dashboard. You’ll get a quick walk through of the Jigsy interface. It will give you some quick pointers. Read each one and then click the Account button in the upper-right portion of the screen. When you do this, you’ll be told you need to verify your account by visiting your email inbox.
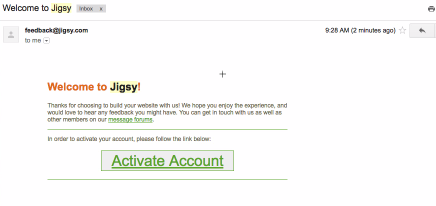
When you go to your email, you should see an email from Jigsy that looks something like what I show below. You’ll want to click Activate Account from within the email.
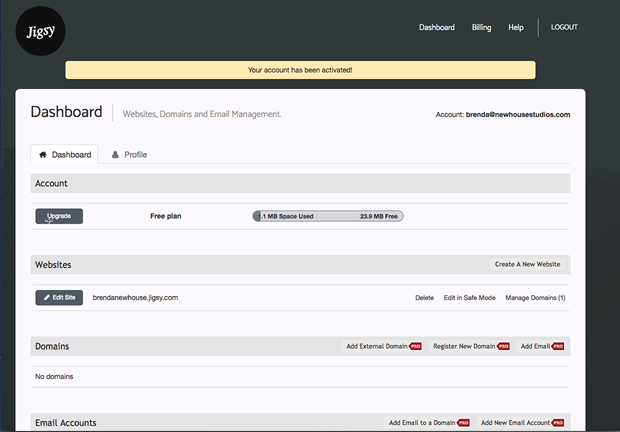
Next, you’ll be shown your account details screen. To upgrade your account to a paid level, click Upgrade.
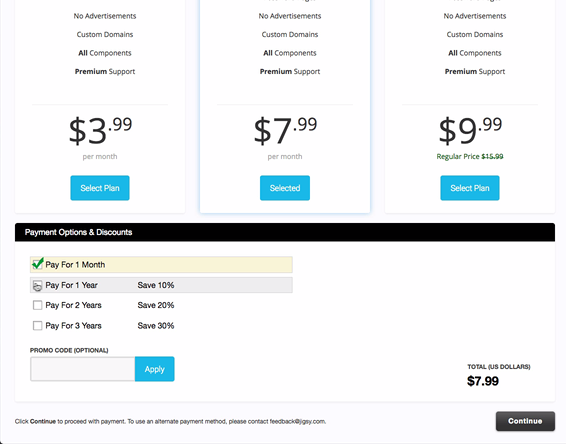
If you are 100% sure you want to use Jigsy for your business, you’ll be ready to select the length of your account. You can pay for monthly, yearly, and longer. The longer you select for an account term, the more you save. If you haven’t taken time with Jigsy as a free account, you should do so before paying for it. At a minimum, watch some of my Jigsy tutorials to see how the website builder works. You should also check out at least two other website builders before committing to one. Just sign up for the free account and try to do the same things in each account to see which website builder makes the most sense to you. This will take you a couple hours.
Once you’re 100% sure Jigsy is the website builder for you, click the upgrade button to pay for your Jigsy account.
If you are a new business or new to being online, I recommend paying for one year. This is because in the first year of having a website you will start to learn a lot about what you want and don’t want as you build your website. If, after a year, you find Jigsy has all you need for now, you might want to pay for two years to get the added savings.
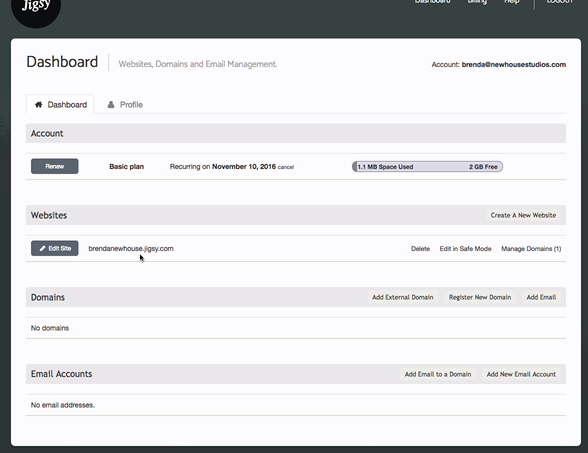
After you have paid for your Jigsy account, you’ll be back in your account details screen. I want to point out that your Jigsy domain name is shown on this screen. When you are ready to make your site live and promote it, you can get your own domain applied to the account. But for now, you’ll see “xxxxx.jigsy.com” is your domain name and that’s fine for now until your site is ready for the public.
Leave a Reply