When trying to decide what to blog about, I like to turn to Google Analytics, especially the section in Google Analytics that shows Google Search Console information. Why does this help me with figuring out what to blog about next? Because I can see things like what people are typing into Google related to my content, even if they don’t actually click through to my site. A lot of times when I look at this information in Google Analytics, I get tons of ideas for blog posts because I can see phrases and questions people have typed into Google that relate to content I have on my site. I can also see what search terms I received clicks for and what search terms I didn’t, which can tell me what content people think relates the best to the terms they used to search.
Want Your Own Focus Group?
Connect Google Search Console to Google Analytics.
So this is kind of like having a focus group to turn to when you want to know what people really want to know, not just what you think people want to know. I‘ve found out some pretty amazing information and it has made me better at blogging because it has given me permission to share more and learn more about specific areas of blogging, website strategy, online marketing, and email marketing. In this article, I am going to show you how to connect Google Search Console to Google Analytics so you can get more blogging ideas and be a better service to all who come to your blog or website.
Here’s How to Connect Google Search Console to Google Analytics
In order to see Search Console data inside of Google Analytics, you’ll need
- Google Analytics set up for your website and
- Google Search Console set up before connecting the two services.
If you haven’t already set up Google Analytics for your website, see my article here for directions.
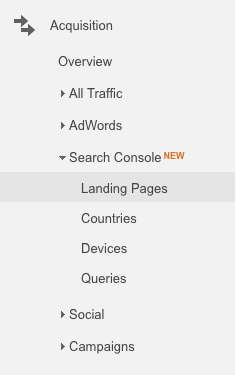
Once you’ve set up Google Search Console and Google Analytics, you’re ready to connect them. You’ll connect the two by logging into your Google Analytics account and scrolling down to Acquisition → Search Console, as shown below.
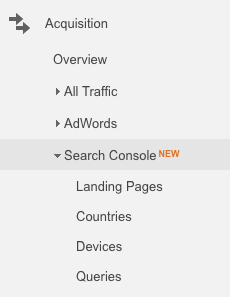
From this section of Google Analytics, you can click on any of the four options to start the process. I usually just click on Landing Pages. You’ll see this screen next:
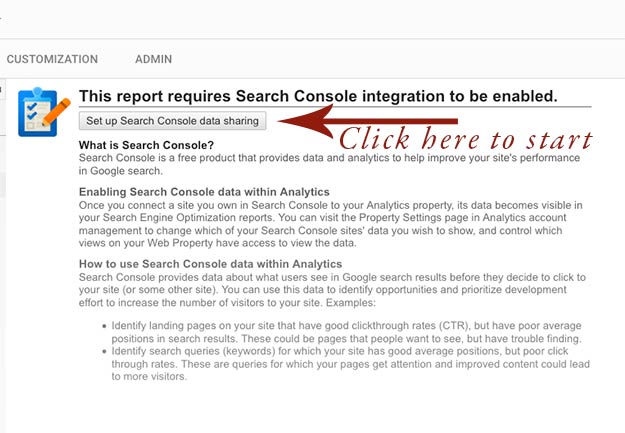
From the screen above, you’ll select Set up Webmaster Tools data sharing.
When you do this, you’ll be directed to the Property Settings page for your Google Analytics account and you’ll need to scroll down:
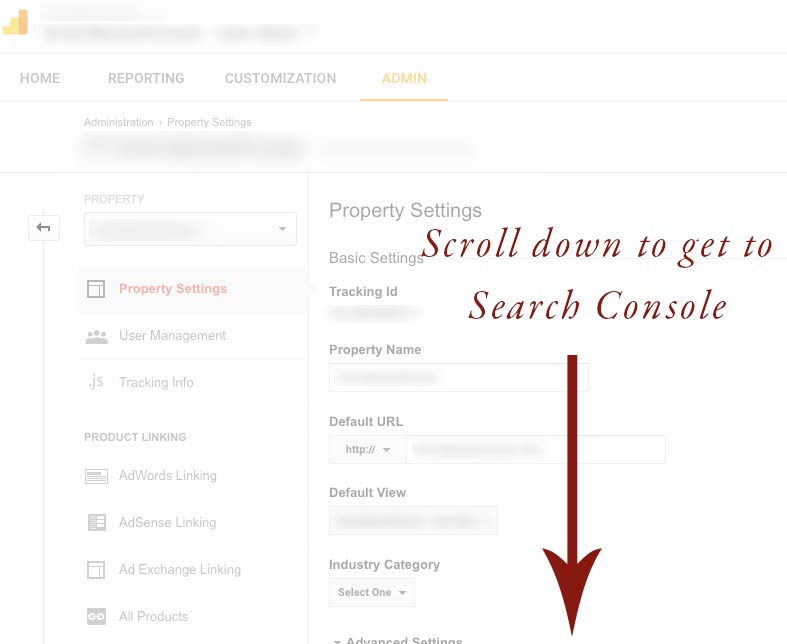
You’ll want to scroll down to the very bottom of this page until you see this:
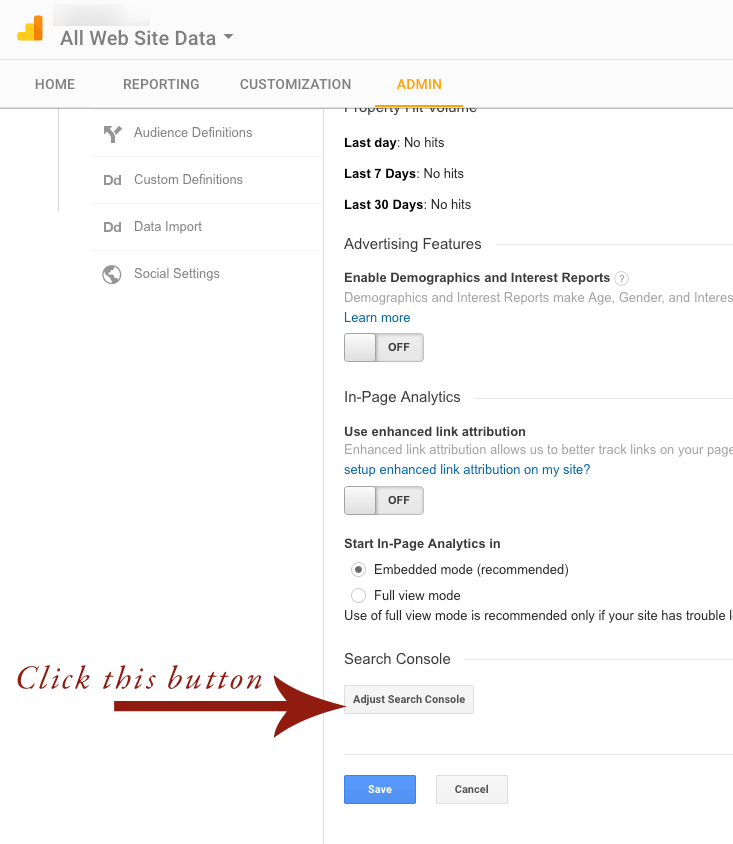
Google likes lots of clicks, apparently :) Once you click the Adjust Search Console button, shown above, you get to click yet another button:
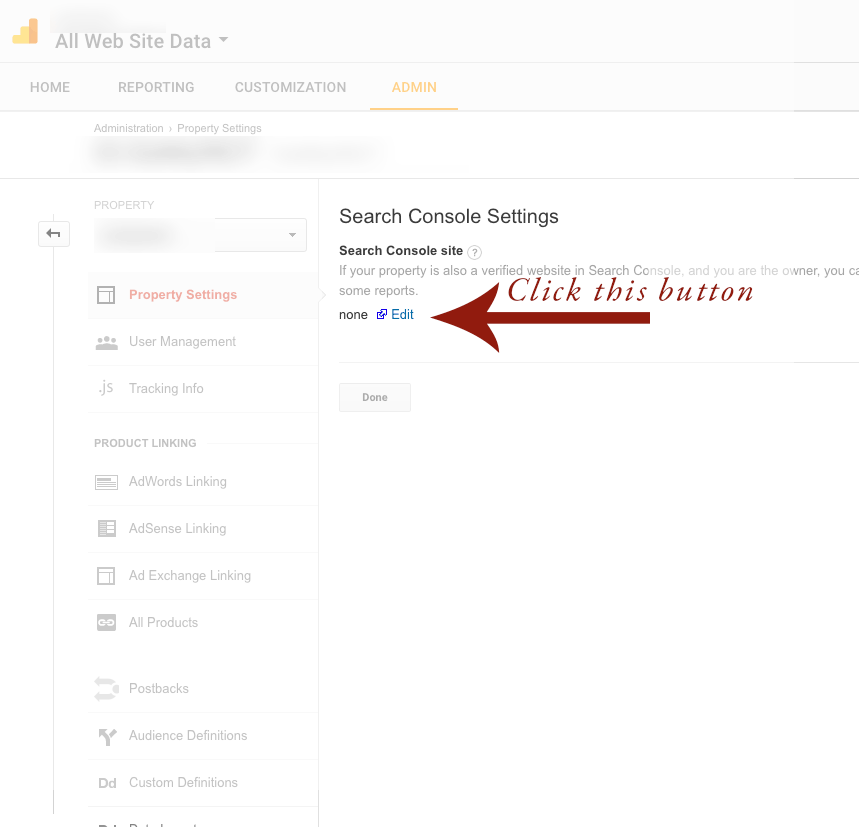
From the screen above, you’ll want to select Edit. Once you do, you’ll need to choose your website from the screen below and click Save.
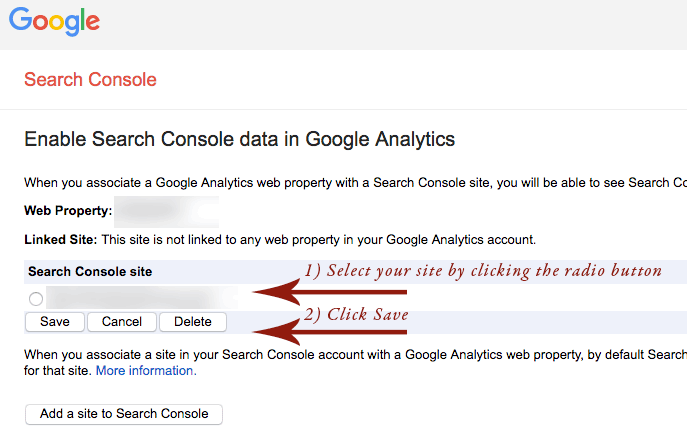
After you click Save, you’ll be asked to confirm that you want Google Analytics to pull in the Search Console data for the site you selected:

After you click OK to confirm the association, you can go back to Google Analytics Property Settings. To return to the reporting section, you’ll want to scroll up to the top of the Properties Settings screen and click Reporting so you can return to your website’s Analytics reports.

To get back to the Search Console information, you’ll scroll down to Acquisition → Search Console → Landing Pages.
If you just set up Search Console, you’ll need to wait a couple days before you’ll see data showing. Search Console is always showing data two days after it has collected it. If you have had Search Console configured for a number of days already, all of the data that Search Console has will show up in your Analytics.