The MailChimp hero image is a long-awaited feature. What’s a hero image? You might also think of a hero image as a background image with text sitting over it.
In my last article, I talk about how to choose hero images and ways to make your hero image successful. You might want to have a look at that article first.
This is more of a MailChimp tutorial. I’m going to show you the MailChimp hero image setup process. In my next article, I’ll show you how to test your hero image MailChimp emails, which you need to do. This is a newer feature and a lot of email clients are funny about it. You also need to test because sometimes your text that is sitting over the background image can do some not-so-good things, like be unreadable, on certain devices.
MailChimp Hero Image Setup Step 1 – The Template
If you are using a template, and most of us do, you need to use a new MailChimp template if you want to have hero images in your email.
How do you know if your MailChimp template is new enough? Just walk through the next steps with me; early in the process, there’s an option that won’t appear if your MailChimp template is outdated. I updated my MailChimp template in May of 2015. That is too old of a template. It doesn’t have the hero image feature. I had to make a new template in order to see the hero image feature.
So if you want to play it safe, create a new template. Don’t replicate your old one. Create a new MailChimp template. However, if you are very new to MailChimp (as in your account started in October 2016 or later) or if you just updated your template in the last month or so, carry on to Step 2.
In this tutorial, I am using a template I made based off of MailChimp’s Basic One-Column template. MailChimp recommends adding background images to single-column sections to keep your emails displaying as consistently as possible when viewed on mobile devices.
Step 2 – The Area for Your Hero Image
Begin by creating a campaign in the same way you usually do. In the screen shots below, I am basing my campaign on a Regular ‘ol Campaign. If you created a new MailChimp template, remember to choose it and not an old one.
You can add a hero image in MailChimp to these sections:
- Pre-header
- Header
- Body
- Column
- Footer
In this case, I’m going to add a hero image to my header. It will promote my free WordPress Tutorial Video Course, so I’m going to choose the image I am using in other promotional materials for the course.
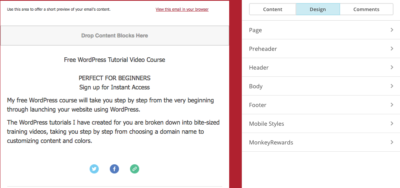
To begin, I will select Design.
Please note that if you have your cursor in a text area or any other content block, the editing pane on the right-hand side won’t show the Design tab. Save and Close to get out of that content block. Then you should see the Content, Design, and Comments tab, as shown below. “Design” is highlighted in blue.
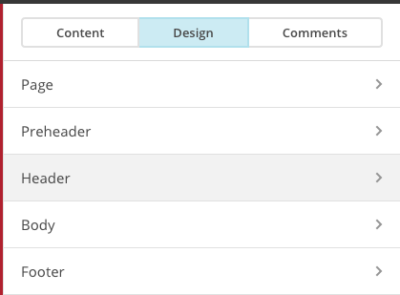
Next, I’ll select Header
Step 3 – Adding Your Hero Image to Your Email
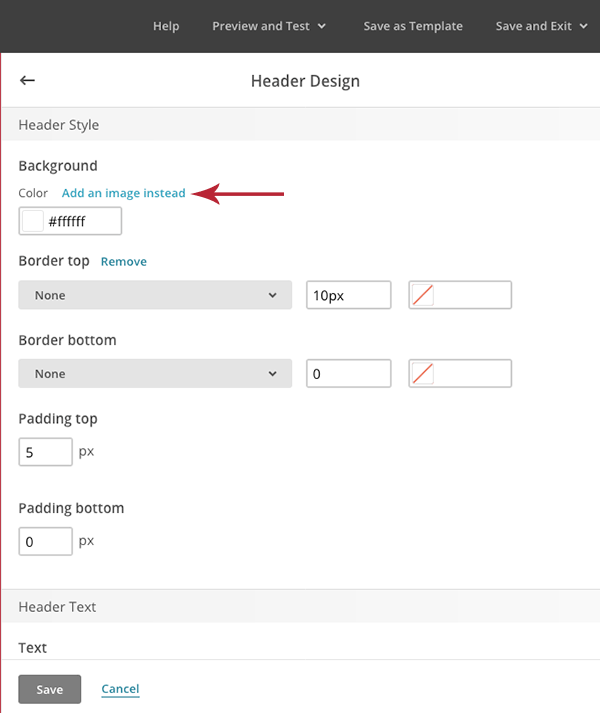
A MailChimp hero image is really a background image. So, to add a MailChimp hero image, you’ll select “Add an image instead” in the Background styling section, as shown below.
Step 4 – Adding a Background Color
There are many email clients that won’t support a background image. When they don’t support a background image, the email client (like Outlook) will simply show whatever background color you assigned to the area instead of the image. So it is very important that you select a Fallback background color. In this case, I sampled a color from the image and put that color’s number in the Fallback color field.
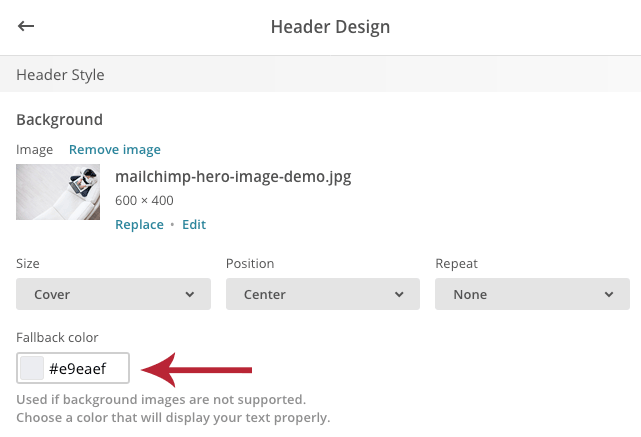
Also, note that just above the FallBack color there are settings for the size of your background image. The settings I have selected shown above will work great for covering the whole space with the image. When I test my hero image later, I’ll make sure I like what those settings do in different devices.
In the Header Design section, there are still more choices for font and links. They happen to already be dark colors that should contrast well with most of the image. But first, before messing with them further, I’d like to add text to the header area.
So for now, I will just click Save to close the Header Design section.
Step 5 – Adding Content Over a MailChimp Hero Image
Here’s how my email looks right now:
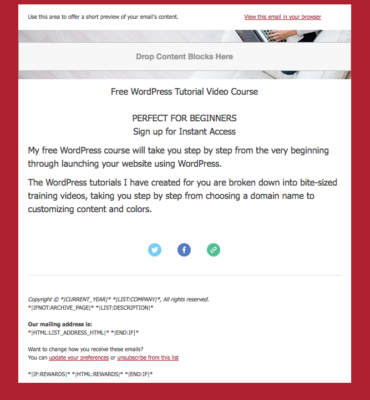
You can see that the hero image is showing up, but I need to add some content to the header. To do this, I am first going to click the Content tab.

Next, I am going to select the Text content block. I’ll do this by left-clicking on “Text,” holding down my mouse button, and dragging the block.
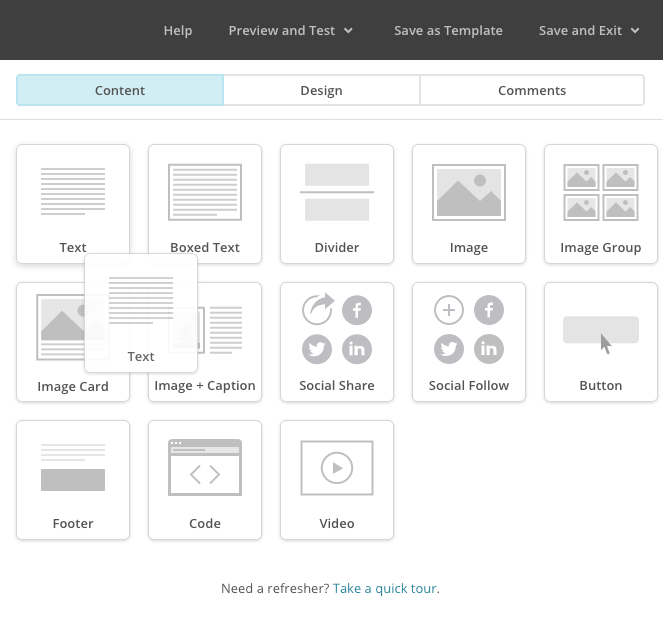
I will drag the block to the header area of my email. When MailChimp senses that I have my text content block in the header area, it will get a blue highlighted outline around it; and that is when I can let go of my mouse to place the text content block.
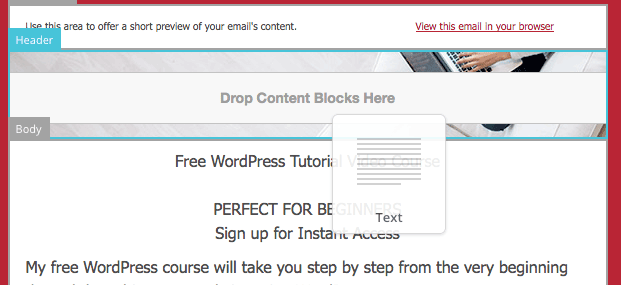
Now here’s what my header looks like. It has placeholder text from MailChimp in the header area.

I just need to click once in the placeholder text area to activate the editing panel on the right-hand side of the screen.
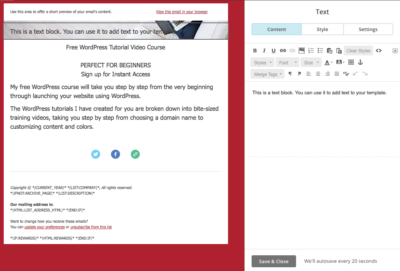
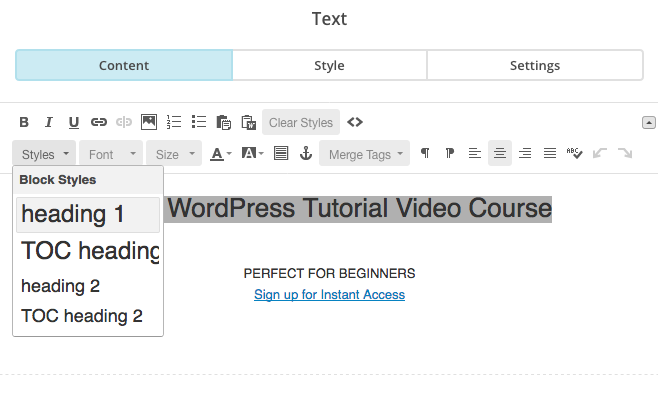
I will begin by typing in my text in the editor. I’m using the area to announce my free WordPress Video Tutorial Course. I’ve made the big text a Heading 1. I’ve also included a hyperlink to the course in my header area so someone can sign up before scrolling down in the email if they so choose.
If you look at my email, you can see that you can’t really read the text sitting over the hero image.

Because the text wasn’t readable over the hero image, I changed the heading to the same red font as my background. This red is the same red I use in my online branding, so you’ll see it on my website and in my online ads.
I also decided to have the text align left to help keep the text off of the busiest part of the image, which is the laptop in the right-hand corner.

Notice that the text area has a gray border. I don’t want the border. It’s sitting over the image and it is distracting.
To get rid of the border, I first saved and closed my text editing area.
Next, I returned to the Design area and selected Header.

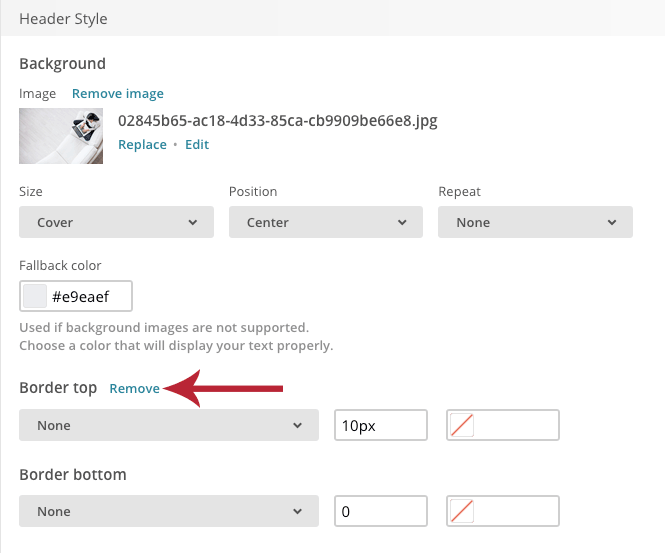
In my case, I had some settings for the border in the header in place. I clicked the “Remove” link next to “Border top” and then clicked “save.”
And now my MailChimp hero image is all good to go. Or is it? You need to check your email to see if all is okay even if the image doesn’t display and you also want to see what the hero image does when the email is viewed in different email clients. How do you do that? You will need to test your email. My next article will show you how.
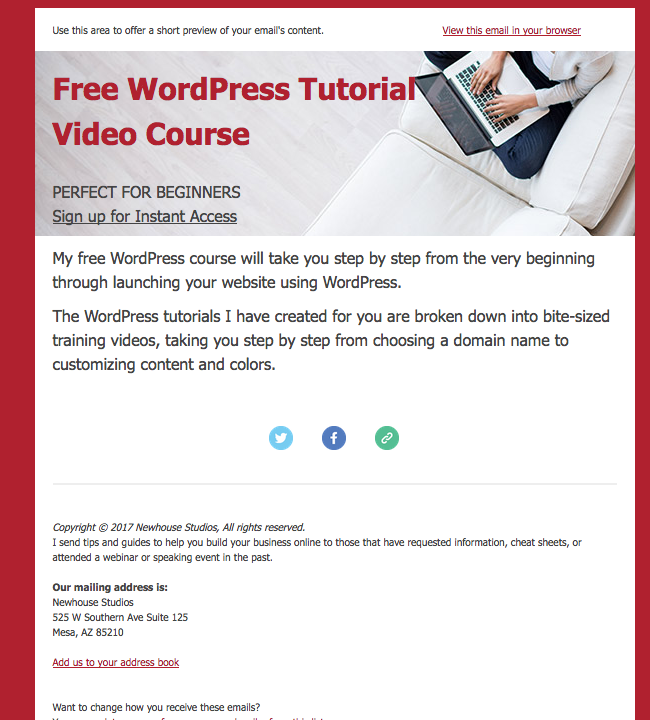
And here’s how my email looks for now (before testing):
Thank you!!! This was driving me crazy. There were no tuts I could find, yours is so clear.