In my last article, I asked the question: “Are you trying to decide what to blog about?” I shared with you that I believe Google Analytics has been a tremendous help when I am looking for what to blog about next. I explained a number of things I use it for to help me figure out:
- What people are most interested in that’s already on my site.
- The things Google thinks I am knowledgeable about.
- When I know the first two things, I can go from there and build upon my strongest areas. This has been a huge help to me in the past, especially when I am stuck for ideas about what to blog about, because ultimately this comes down to service. The more you give people the things they need, the more valuable you will be and your business will thrive.
Since I know there’s lots of people who aren’t too sure about how to install Google Analytics, I figure it would be good for me to start by walking you through the steps of how to install Google Analytics. My next article will show you how to use Google Analytics to help you figure out what to blog about.
I’m going to show you how to do things as simply as possible. There’s lots of guidance online about how to install Google Analytics, so if what I’m saying isn’t enough help, you might want to start with the source, Google. They get a bit techy in their approach, so I’m showing you here with the easiest steps I can.
What you’ll need to get started:
- A website
- A google account (if you have a Gmail account, this will work)
Your first step is to go to www.google.com/analytics/
Next, you’ll need to sign in or create an account.

When you click Sign In, you’ll get a huge drop-down menu. Select Google Analytics.

Google will then prompt you to login with your Google account. If you have a Gmail account you can use it; it might ask you some questions to start your Analytics profile. During these initial questions, it might ask you to set up a property. For most people, you’ll have just one site you’ll be tracking. If this is the case, your Account Name and Website Name can be the same. Next you’ll put in your website’s URL, Country, and Time Zone.
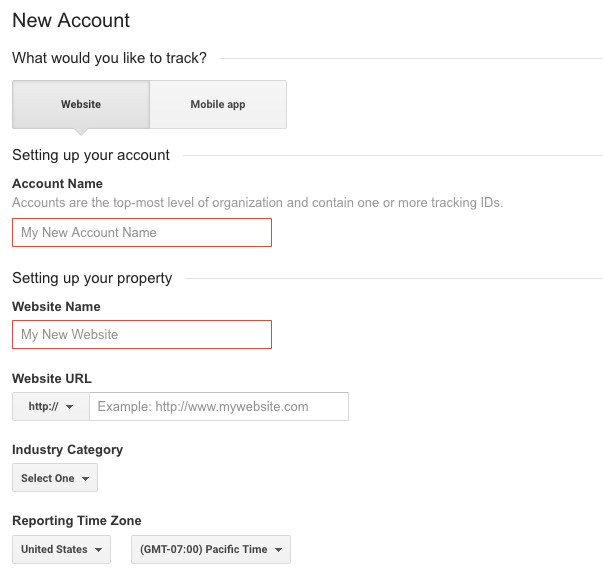
After filling out all the questions on the new account screen, you’ll click a Get Tracking ID button. This is where you can get code to embed on your site or simply get your Google Analytics ID. After filling out all the questions on the new account screen, you’ll click a Get Tracking ID button. This is where you can get code to embed on your site or simply get your Google Analytics ID.
![]()
Once you get to the Tracking ID screen, you’ll see a Tracking ID and Website tracking script. The screen should look something like the screen below.
![]()
Installing Google Analytics Tracking on Your Website
You’ll have to check with your website to find out what you need, but it is normally either the tracking code or just the tracking ID. Your website should tell you.
Tracking ID Only
I highly recommend being signed into your Google Analytics account in the same browser as your website while putting your Tracking ID into your site. Why? Because sometimes the site wants to connect to your Analytics account. If you are already signed into your Analytics account in one browser tab and you’re signed into your website in a second browser tab, it makes the process much easier to do the verification process.
Installing Google Analytics in a SquareSpace site:
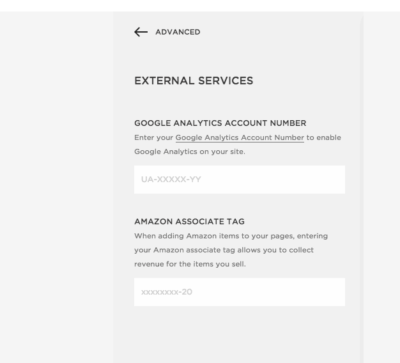
Squarespace is an example of only needing your Google Analytics tracking code. Here’s a screenshot of where it gets installed. You can also read the full instructions at Squarespace by clicking here.
Installing Google Analytics in WordPress
Your WordPress theme might have a place to put in either your tracking ID or your tracking code. Here’s three ways I know of to get Google Analytics installed in a WordPress site.
Installing Google Analytics if your site is through WordPress.com
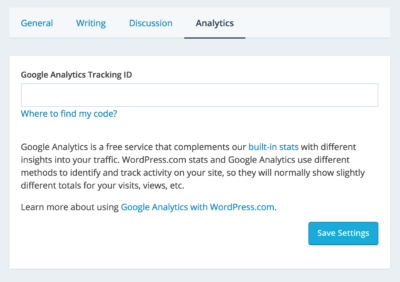
A site that is through WordPress.com requires a Business Plan. Once you have a Business Plan with WordPress.com, you just need your Google Analytics Tracking ID. You can see where to insert the Google Analytics Tracking ID below and you can read the full instructions at WordPress.com by clicking here.
Installing Google Analytics on a self-hosted WordPress website
If you are on a self-hosted WordPress site, your process will be different. You are running a self-hosted WordPress site if you are hosting your WordPress site through GoDaddy, Blue Host, Host Gator, Media Temple, WP Engine, etc. Frequently, people will refer to self-hosted WordPress sites as WordPress.org. If you don’t login to your WordPress site by going to WordPress.com, you are probably running a self-hosted WordPress site.
If you are using a theme that lets you put scripts in the header of your theme, you can paste in your Google Analytics embed code in this section. An example of a theme that lets you paste code in the header or footer is StudioPress’s Genesis. If you are running a Genesis child theme, you’ll just go into the Genesis Theme Settings and insert the code in the Header Scripts area, shown here.

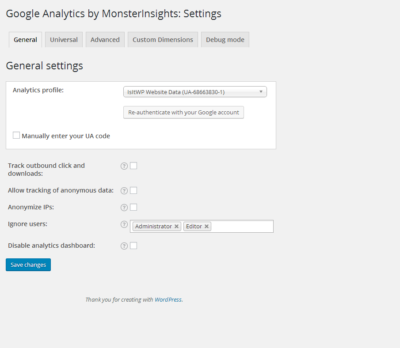
If you aren’t sure if you can insert scripts in your WordPress theme’s header or footer sections, using a plugin is a great way to go. Google Analytics by MonsterInsights is pretty easy to install and use. This is a scenario where the plugin verifies your settings by connecting to your Google account, so if you are already signed into your Google Analytics account in one browser tab before setting up this plugin, it will help the verification process along. The screenshot below shows where you set up Google Analytics with MonsterInsights. You can either let it connect to your Analytics profile or you can manually enter your code.
Once you have your Google Analytics installed, the next step is to know what information to look at to help you figure out what to blog about. In the next section, I will show you where I look inside of Google Analytics for tons of blogging inspiration.

Leave a Reply