Hey! I finally made it to digging in deeper to the website builders I’ve been staring at for months.
I will be doing (or attempting to, anyway) the same tasks in each builder to compare apples to apples as much as possible.
Today I am reviewing and giving a tutorial on how to build a photo gallery and slideshow in the website builder by Webs.com.
But first…
Creating a Free Webs.com Account
This was super easy. I believe I had a free Webs.com account created in under five minutes. As part of the process, Webs.com had me select a category for my new site, choose a domain name, select a website template, and name the first few pages for my site. Whew! All that in five minutes. Wow.
I’ve never worked with Webs.com before, so it was very refreshing to experience such an easy setup process and it was also really cool that for the free account they didn’t ask for anything more than my email address.
Creating a Photo Gallery and Slideshow in Webs.com
This was stunningly easy. I am going to outline the basic steps below, but if you want to simply watch me create a photo gallery and then a slideshow, just watch the video below. You will see both created in under ten minutes by me; remember, this is the very first experience I have had with Webs.com website builder.
You can begin the process of creating a photo gallery either when you first create your account by choosing “photos” as one of your pages or, when you are on a page within your Webs.com website, you can select “other” from the bottom of the screen and choose “apps”. From there you can choose Photo Gallery.
Now, really, that was the hardest part of the process.
If you chose “photos” as one of your pages when you began your Webs.com account, there will be a “Photos” page in your navigation bar. Select that page.
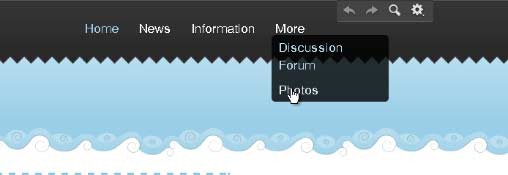
You will then arrive on a Photo Gallery page that will prompt you to click the “Add Photos” link.
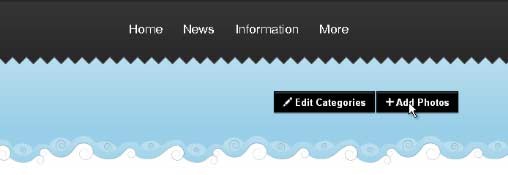
After clicking the “Add Photos” link, you will give your first photo album a name. In Webs.com, your photo gallery can have multiple photo albums.
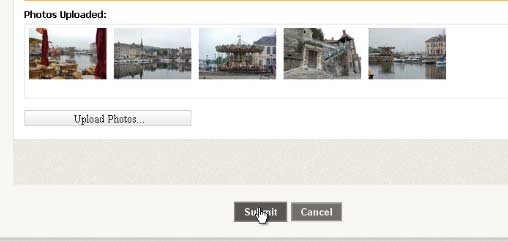
After you give your photo album a title, you will be prompted to upload photos. I recommended uploading no more than ten photos at a time. I uploaded five photos at one time. It took a little less than one minute per photo.
The next step in creating your photo album is to click “submit” and then you will go to an Album Details screen.
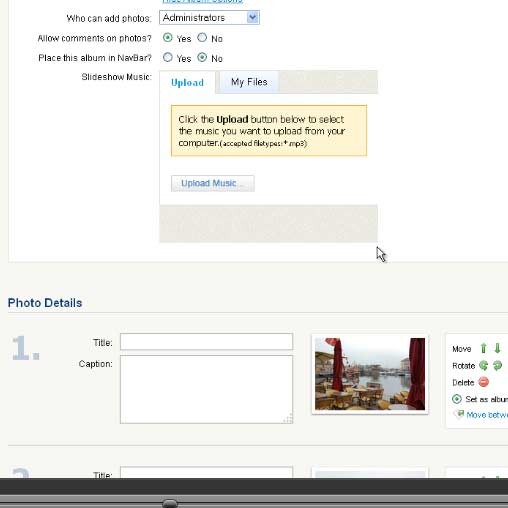
The Album Details screen is where you can give your photo album a description and give each photo a name and a caption. It is also on this screen where you will assign an album cover and set the order of your photos. A neat feature that Webs.com allows their users to do is to have collaborators, so you can allow others to add photos and comment on the photos. This is all very simple to understand based on the visual cues provided on the page.
And after that last step, you are done. You can add the photo album to your navigation bar if you’d like. Now that the photo album is complete, you see your photo album in a photo gallery and you can load your photo album into a page as a slideshow!
Creating a Slideshow with Webs.com Website Builder
If you already created a photo gallery within Webs.com, you are 90% of the way to a slideshow.
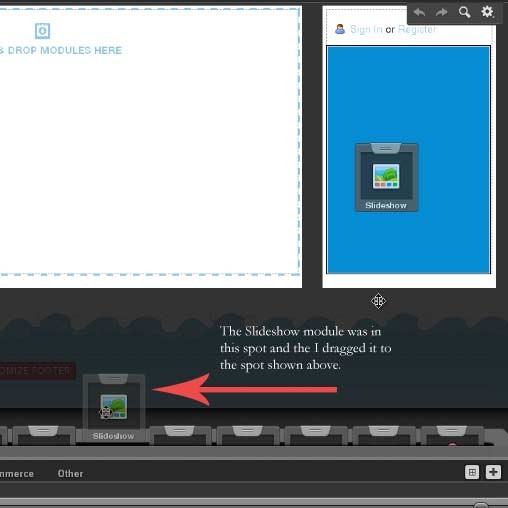
Your next step will be to navigate to the page on which you’d like your slideshow to appear.
From the bottom toolbar, click, hold, and drag the “slideshow” icon to the location on your page where you would like your slideshow to appear.
Next you can double click your slideshow to either upload photos or select images you have already uploaded.

After your images are selected and/or uploaded, just click the “Add to Slideshow” button.
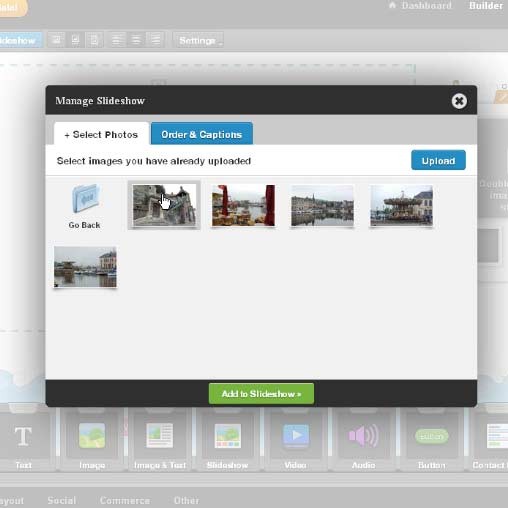
Still within the “Manage Slideshow” dialog box, you now have the option to re-order your photos and add captions to your slideshow photos.
After you are finished ordering the photos in your slideshow, click “Save Changes.” Your Webs.com slideshow is now all set up.

Webs.com Photo Gallery and Slideshow Ease of Use
I didn’t have to read a manual for any step in the process. I created a photo gallery and a slideshow in under ten minutes. It was super simple and very intuitive for the visually-driven website creator. So far, I am very impressed with the Webs.com website builder.
I give Webs.com Photo Gallery and Slideshow tools 10/10.
Leave a Reply